- Published on
Ballistic Bread Baking with BallisticToaster!
- Authors

- Name
- BallisticToaster
- @ballistictoasty
[Editor's Note: The following is an excerpt from a text conversation I had with a friend in December 2020 that I decided to spin out into its own post about how I make my own bread. The recipe itself is pulled from various recipes and YouTube videos online, especially from Binging With Babish. Some things have been added, many grammatical mistakes were corrected, and a few sentences have been changed to make it flow better. If you want a bullet-point version of how to make this recipe, look no further than right below this blurb and you'll find it! God knows no one wants to read War and Peace before they get to the important part of a recipe but if you'd like to witness the chaos that's about to unfold anyway, look below the bullet points and buckle up. Eid Mubarak, y'all! ~BallisticToaster]
Equipment Needed:
Cast Iron Dutch Oven
Scale
Measurement Spoons & Cups
Shopping List:
Bread Flour or All Purpose Flour
Salt (Kosher Salt will do, but this can also be done with Table Salt).
Active Dry Yeast or Instant Yeast
Water
Method:
Mix together 400 grams of flour, 1/4 tsp of yeast and 1 & 1/2 tsp of kosher salt (or 3/4 tsp of table salt) in a large glass bowl. Pour in 1 & 3/4 a cup of water and proceed to gently mix together until a rough, shaggy ball of dough forms and no dry flour remains.
Cover the bowl with plastic wrap and let it sit at room temperature for 12 to 24 hours, ensuring a tight seal such that no air is able to enter the bowl.
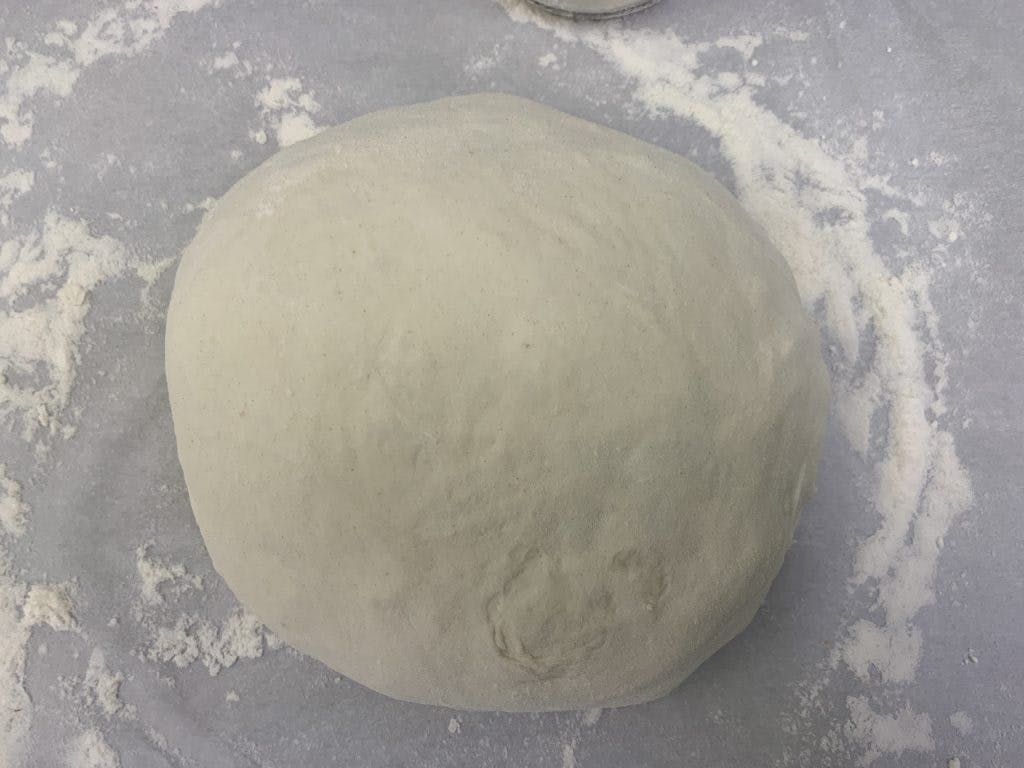
After waiting, remove the plastic wrap from the bowl and pour a little flour on the top of the dough and pour out onto a flour-dusted work surface. Start pulling the dough together from the corners with flour-coated hands and shape until you have a smooth, round, and taut ball of dough.
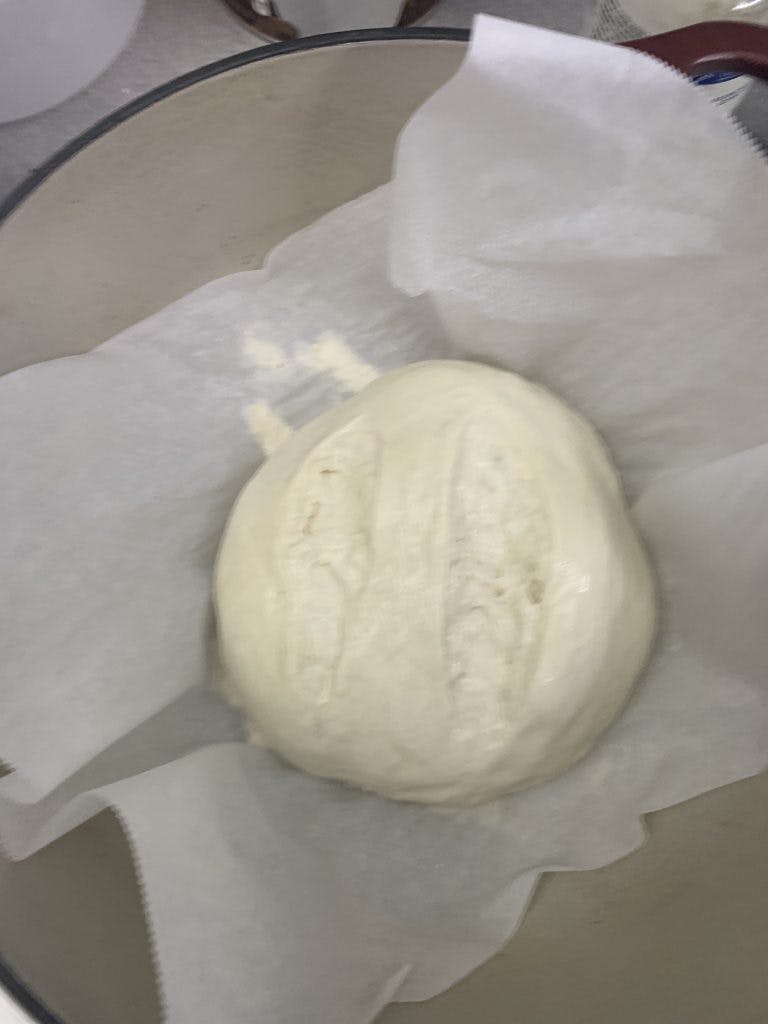
Place the dough onto a piece of parchment paper dusted with flour and coat a clean kitchen towel with flour before placing it on top of your dough ball. Let sit for one to two hours.
Preheat your oven to 425°F and place your cast iron dutch oven inside for at least an hour or for as long as you decide to wait for your loaf to proof again
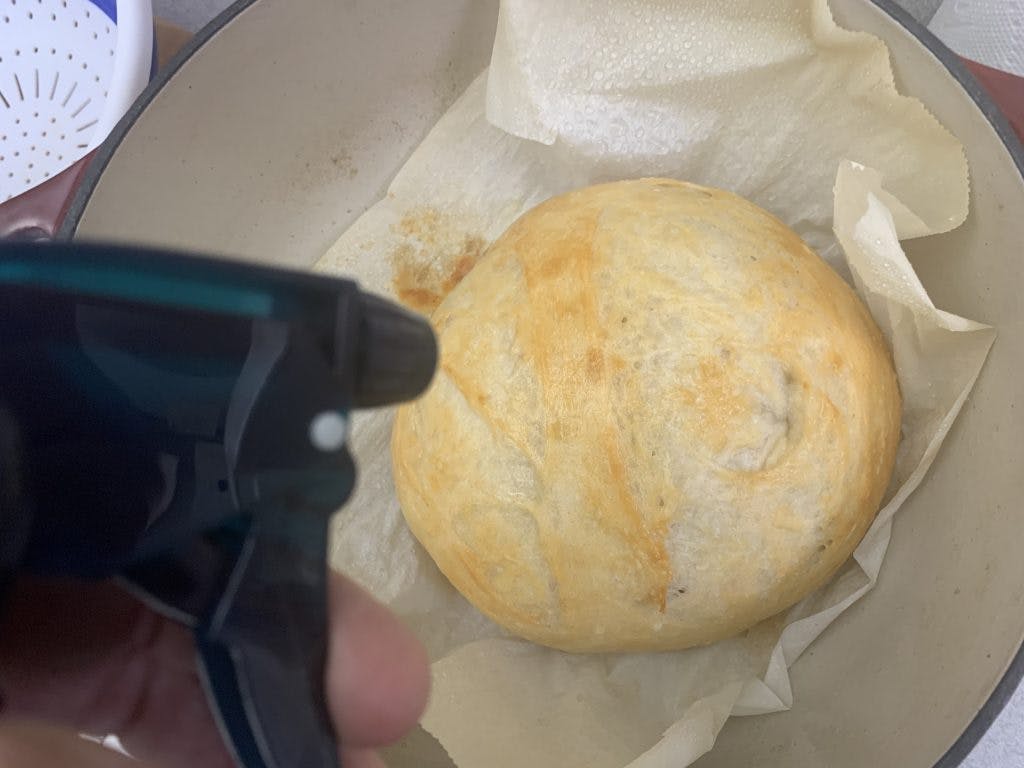
After waiting, remove the towel, shape it into a tighter ball again, then slice the parchment paper around the bread before scoring the top of the loaf with a knife or bread lame. Remove the dutch oven from the oven, open the lid, and drop the loaf directly inside of it with the parchment paper directly below it. Before covering the dutch oven, spritz the loaf with water using a spray bottle.
Place the dutch oven inside of the oven and let it bake for 35 minutes.
After 35 minutes pass, remove the dutch oven, take off the lid, spritz with water again, and put it back into the oven again for another 20 minutes with no lid or until completely done.
Turn the loaf over onto a wire rack and let sit to cool for at least two hours before slicing, serving, and enjoying.

Welcome to the kitchen of Chef Toaster, home to an idiot who once burned down a spatula while boiling eggs! Today, we’re baking bread that’s so good it’ll solve world hunger, save the world, and do your taxes.
Okay maybe not that last part but still it's really damn good & best of all it requires no kneading whatsoever!
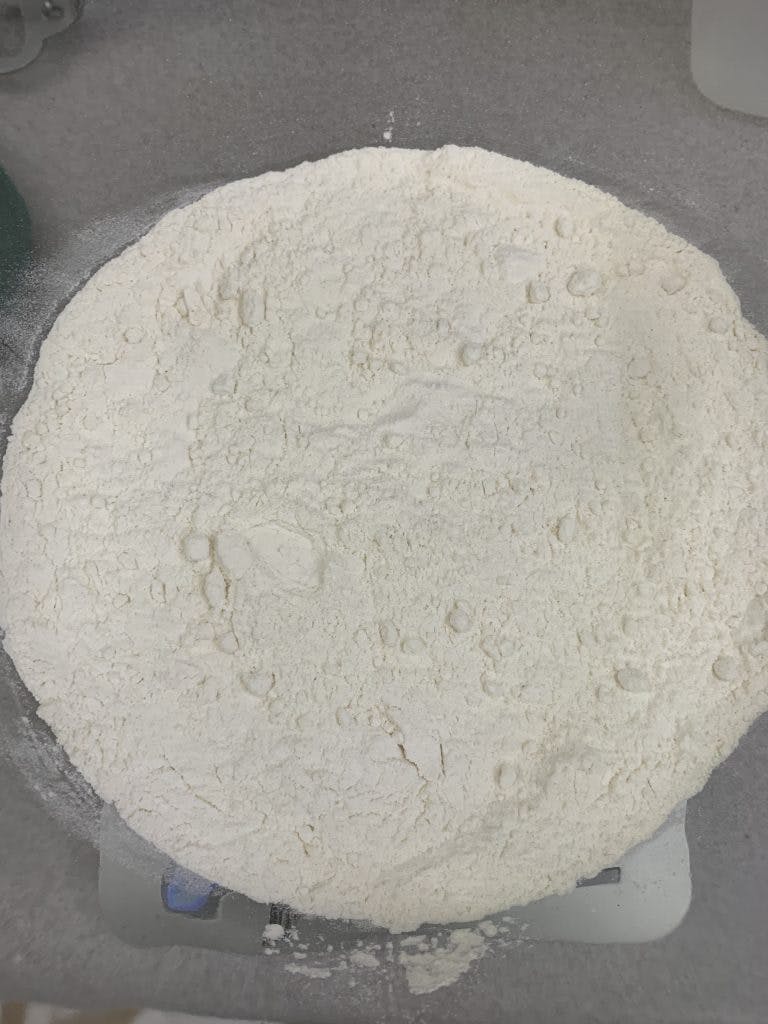
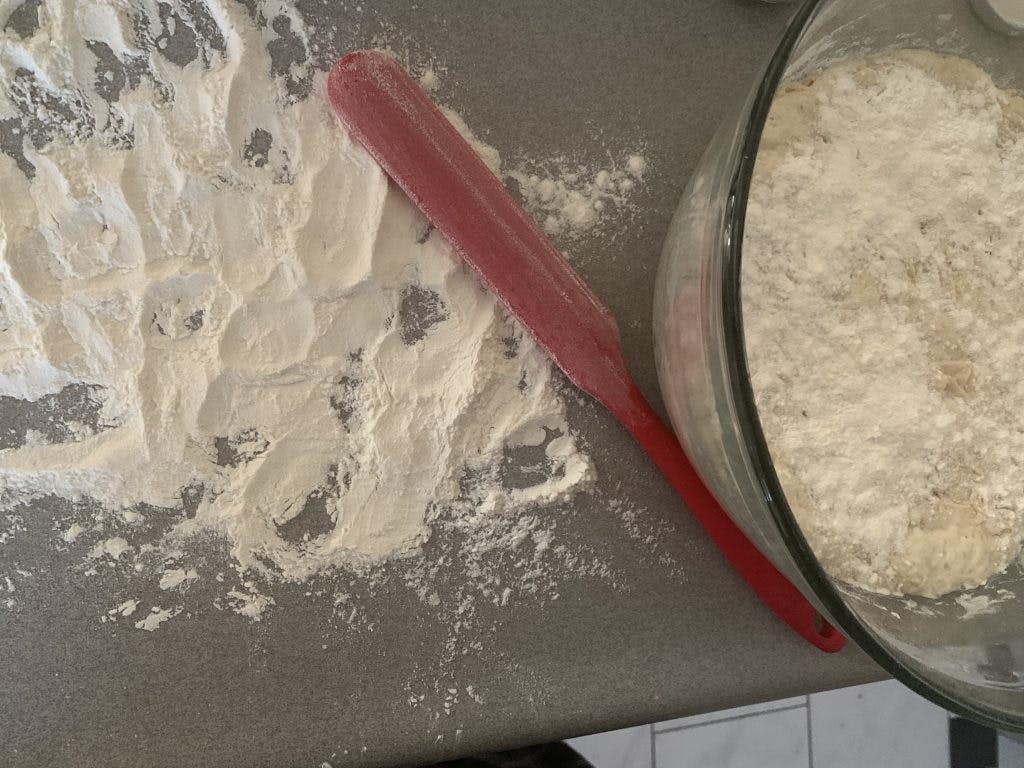
First, start by placing 400 grams of this… suspicious white powder inside of the largest bowl you have in your house. I don’t recommend snorting or eating it, as it smells like a hospital visit and tastes like an intestinal exorcism. You can use bread flour or all-purpose flour, whatever you've got!
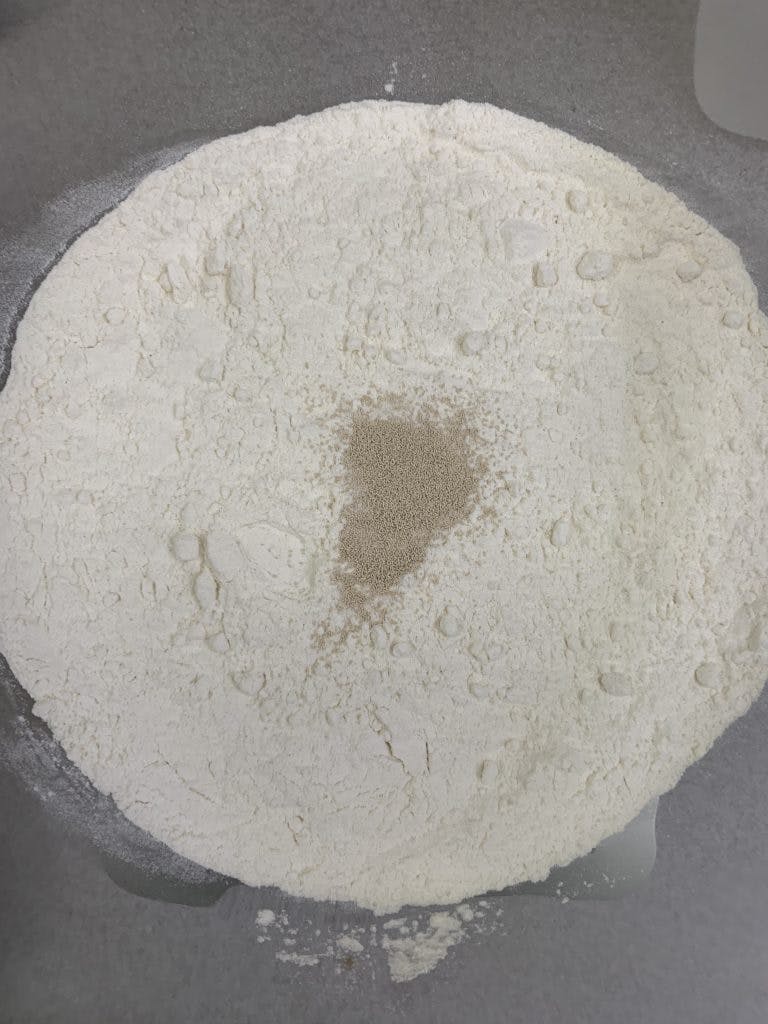
Then put a 1/4 tsp of active dry yeast (instant yeast also works) inside your bread/all-purpose cocaine-I mean, flour and put 1 and a half teaspoons of kosher salt (or 3/4 a teaspoon of table salt if you’re feeling crazy).

Mix the dry stuff together to ensure even dispersal and then pour 1 & 3/4 a cup of water into your weird spice mix. Grab a wooden spoon and proceed to mix the water and dry stuff together until it forms a loose and shaggy ball of dough. Place your arm muscles into mixing your creation until there is no more dry flour left.
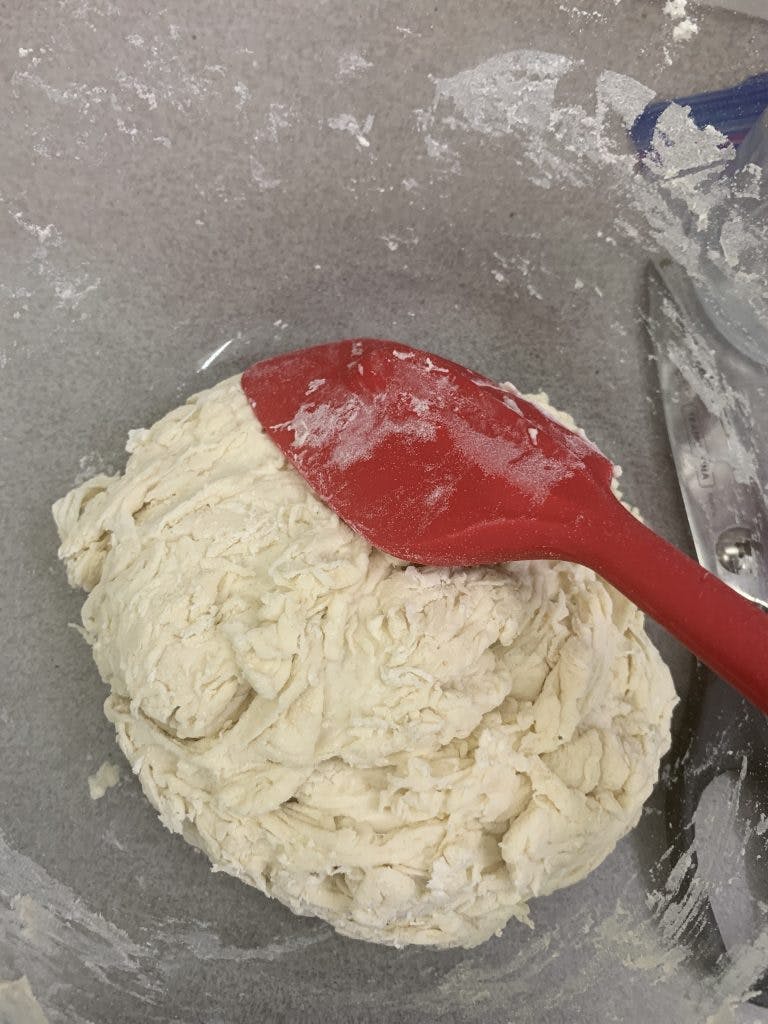
If the dry flour has been absorbed into your weird-alien-brain-looking monstrosity, then you are well on your way to the next step! Convince someone to clean up after you and wrap the top of your bowl in plastic wrap to ensure a tight seal.
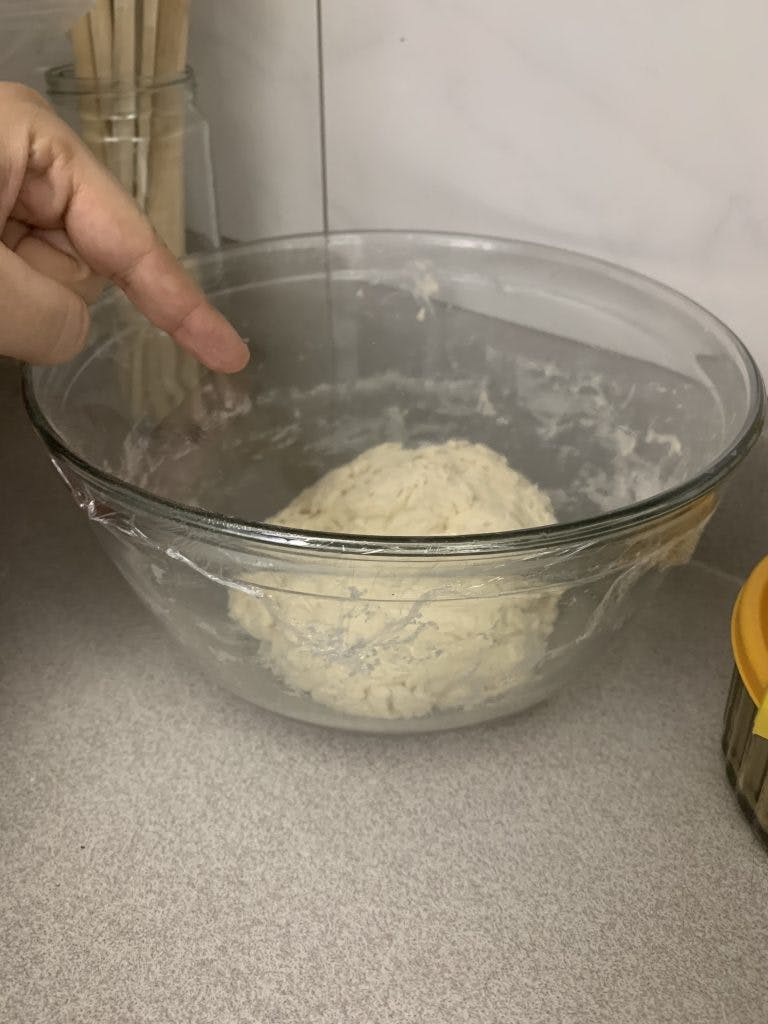
Make sure the seal the plastic wrap creates on your bowl is tight enough that no air can pass through it and you can play the tabla on it, and let it rest for about 12-24 hours. In the meantime, feel free to say some encouraging words to it! Some choice examples include...
“Look at you, you’re getting quite tall look at how fast you’ve grown!”
“You’re almost there, you can do it!”
“Just do it.”
“Grow bitch, grooooow!”
"Rise! RISE MY PRETTY."
Now all you gotta do for the time being is to wait half a full day to a full day before you can start baking for real. Feel free to drink some tea, get some sleep, watch my streams, that or you can even-

18 hours later…

Welcome back to Chef Toaster’s kitchen! Please disregard my usage of this obscene hand gesture; I was asking God above “por que” because while I was partying- uh, I mean waiting for my dough to proof for the last 18 hours, somebody toucha ma spaghet and it made me very upsetti spaghetti. Truly, a great Mediterranean tragedy has occurred here.

But it matters not for our dough has now gotten very poofy, meaning the yeast is very happy and it's time to proceed with the second half of our breadmaking adventure.
Start by pouring some flour onto your work surface, get a long… whatever the hell this thing is supposed to be and coat it with flour. Sprinkle some more flour onto your dough and proceed to scrape the dough onto your work surface.
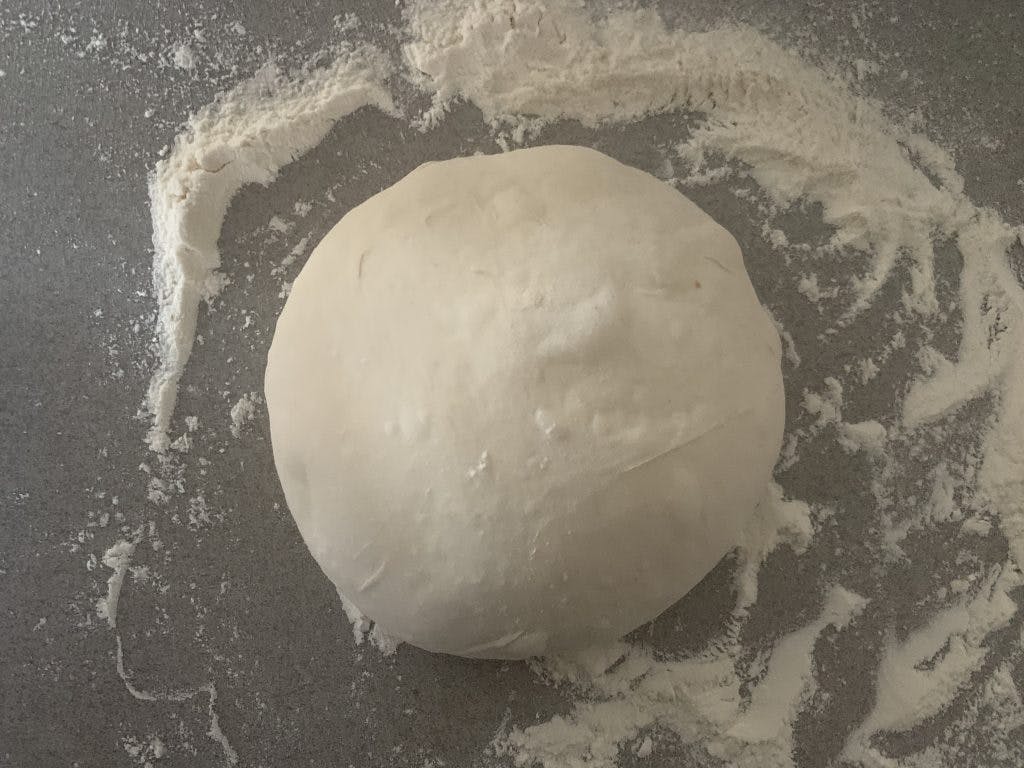
Now comes the fun part for now you must delicately shape the flour into a smooth, taut, round ball with your hands by pulling the corners of the loaf together making sure not to knead it! Be sure to cover your hands in plenty of flour and remember: If by the end of the shaping process, your clothes don’t look like a drug deal gone bad, you’re doing it wrong! I mean unless you have an apron, then just make sure your apron looks like that way instead!
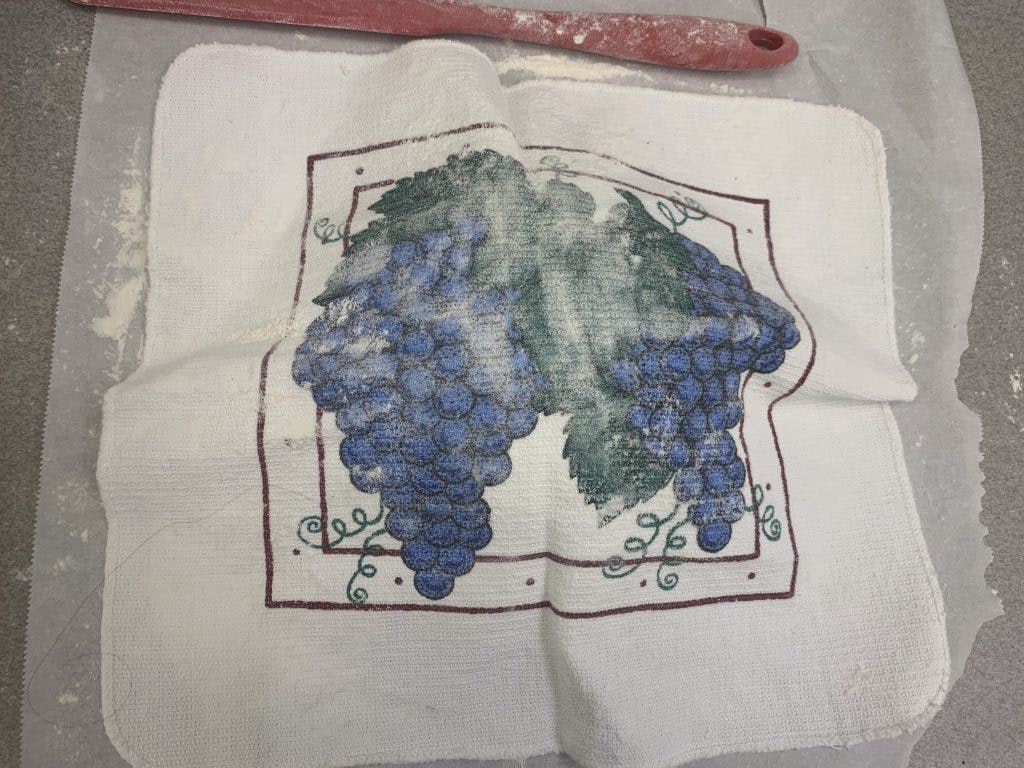
Cut some parchment paper and cover it with a bit more flour and plop the dough on top of it, then cover a towel that’s been dusted on both sides with -you guessed it!- more flour. You can even use the leftover flour from when you were shaping the dough if there's any left to coat the towel and parchment paper.
Let the dough proof for 1-2 more hours, giving it enough time to think about what it’s going to be when it’s done! Maybe a sandwich, maybe a late night snack at 3AM. Bread does not judge. (unless you’re gluten sensitive or something in which case why are you even eating bread mio dio)
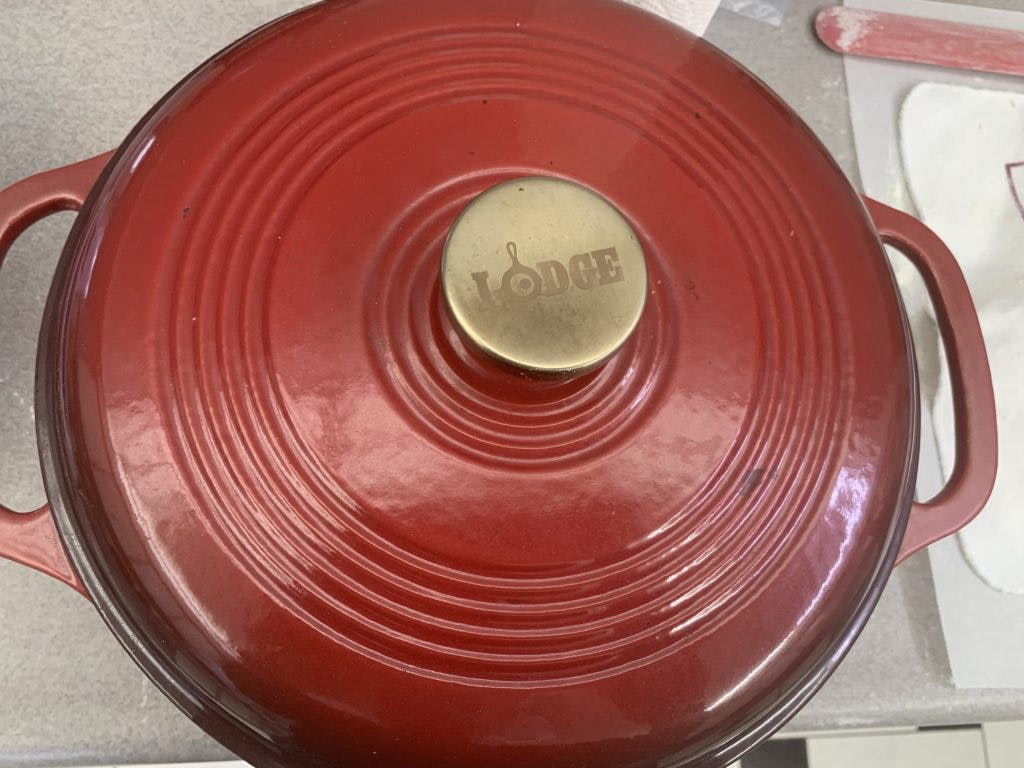
In the meantime, pull out your unfortunately named cookware and preheat your oven to 220°C or 425°F if you’re a heathen - I mean, fond of the metric system. Stick your Dutch oven into the oven as it's preheating so both ovens preheat as your bread continues proofing for the second time.
After an hour or two of procrastina-I mean multitasking, your bread should be noticeably bigger! Shape your dough ball a bit more again and begin preparing for the final step.

Take a bread knife and score the bread with shallow cuts across the loaf with the delicate touch of a surgeon, and scorn you reserve for those who talk out loud in the theatre.
Pull your preheated Dutch oven out of the oven and place the loaf inside of it before liberally spritzing it with water from a spray bottle. Stick your Dutch oven inside the oven again with the lid on and set a timer for 35 minutes.
IT RISES, but we’re not done yet! Pull it out of the oven and spritz the loaf with more water again. Then put the Dutch oven back inside with the lid off and set the timer for another 20 minutes.
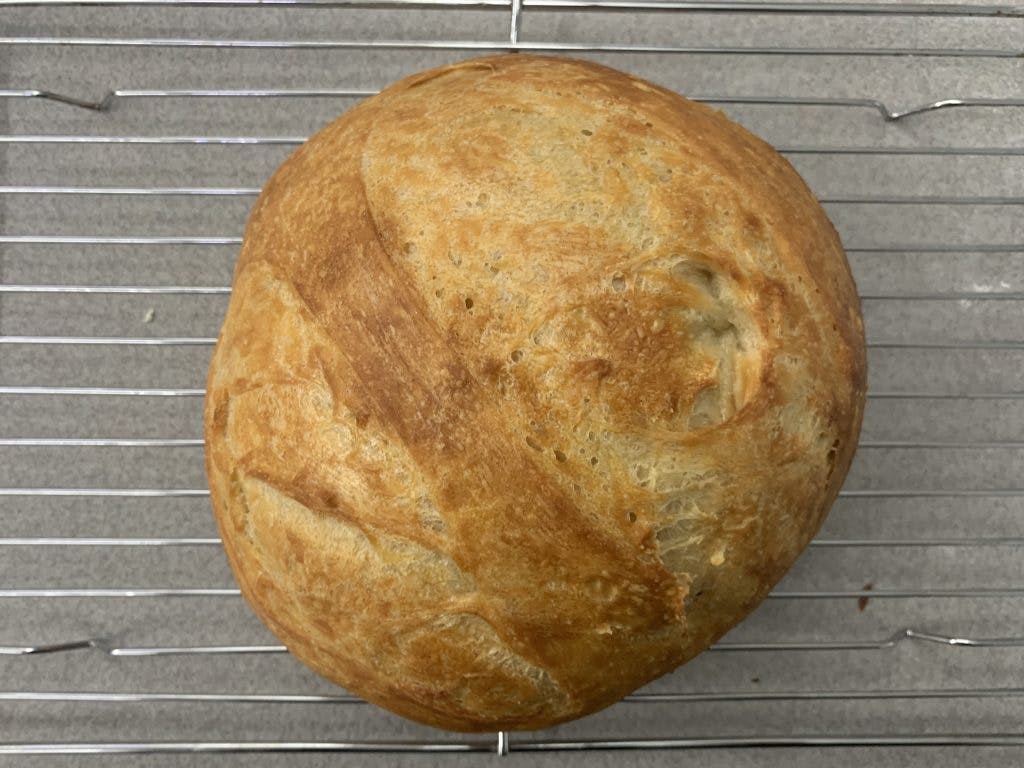
And what we’ve achieved here is nothing short of bellissimo! Evacuate the loaf onto a wire rack and now comes the hard part; letting it cool down for two hours as your house gets filled with the unctuous aromas of fresh bread. If nothing else, think of it as a test of willpower!
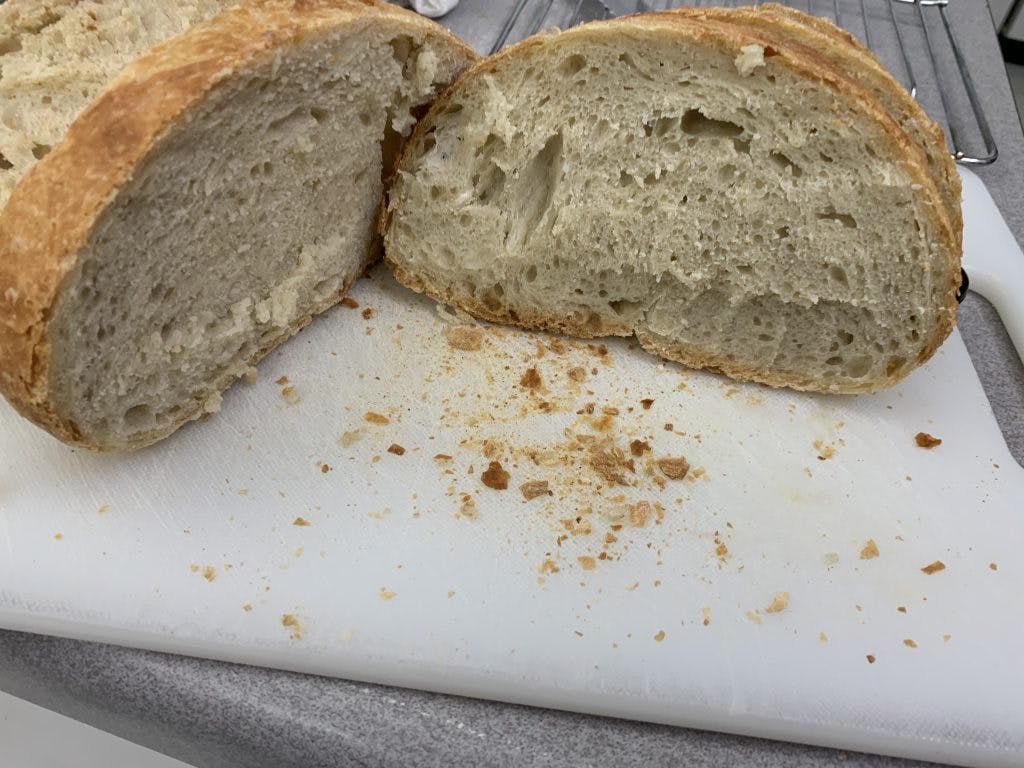
Once your two hours are finished, simply cut into the loaf and admire that which you have created. For truly you have acquired this bread, and all it took was several grams of flour, yeast, and a dream. And an oven, that too.

If you’ve made it this far then thanks for following along and congratulations for having a remarkably long attention span! I hope you give this a try and that it turns out well! Feel free to change it as you wish, add different ingredients, or try out different ones, and share what you come up with! Until next time, that’s a-gonna be it from a- me, chef Toaster, advising you to never cut through an avocado right through the seed.
~BallisticToaster