- Published on
Toasty’s OBS Setup: Audio Mixing
- Authors

- Name
- BallisticToaster
- @ballistictoasty
Audio mixing is one of the most challenging aspects of streaming to manage and it's where your setup will diverge wildly from another person's while also being subject to the most adjustments and tweaks over time. Everyone's audio environment is highly variable based on a number of different factors and everything from the quality of your microphone to how loud your voice is, to the volume of other audio sources are relative to each other, the acoustics of the room you're in (including any soundproofing), background noise, and even your own hearing level to name a few possible factors can have beneficial or detrimental effects on how your stream sounds to your viewers. Proper audio mixing can ensure greater auditory clarity for viewers and is tremendously helpful for those who are hard of hearing, leading to an overall better experience that'll keep your viewers coming back to you.
This section of the guide reflects my audio setup as of October 5th, 2022 and will be subject to changes after this guide goes live as changes and improvements are being made.
Audio Devices and Sources
OBS primarily makes use of two dedicated types of audio sources, inputs and outputs.
- Outputs are for audio sources such as speakers and headphones.
- Inputs comprise microphones and other digital audio interfaces.
- Capture equipment such as Elgato capture cards and webcams come with their own audio inputs and outputs to monitor as well. Be sure to mute your webcam so your main webcam can be used instead.
Outputs
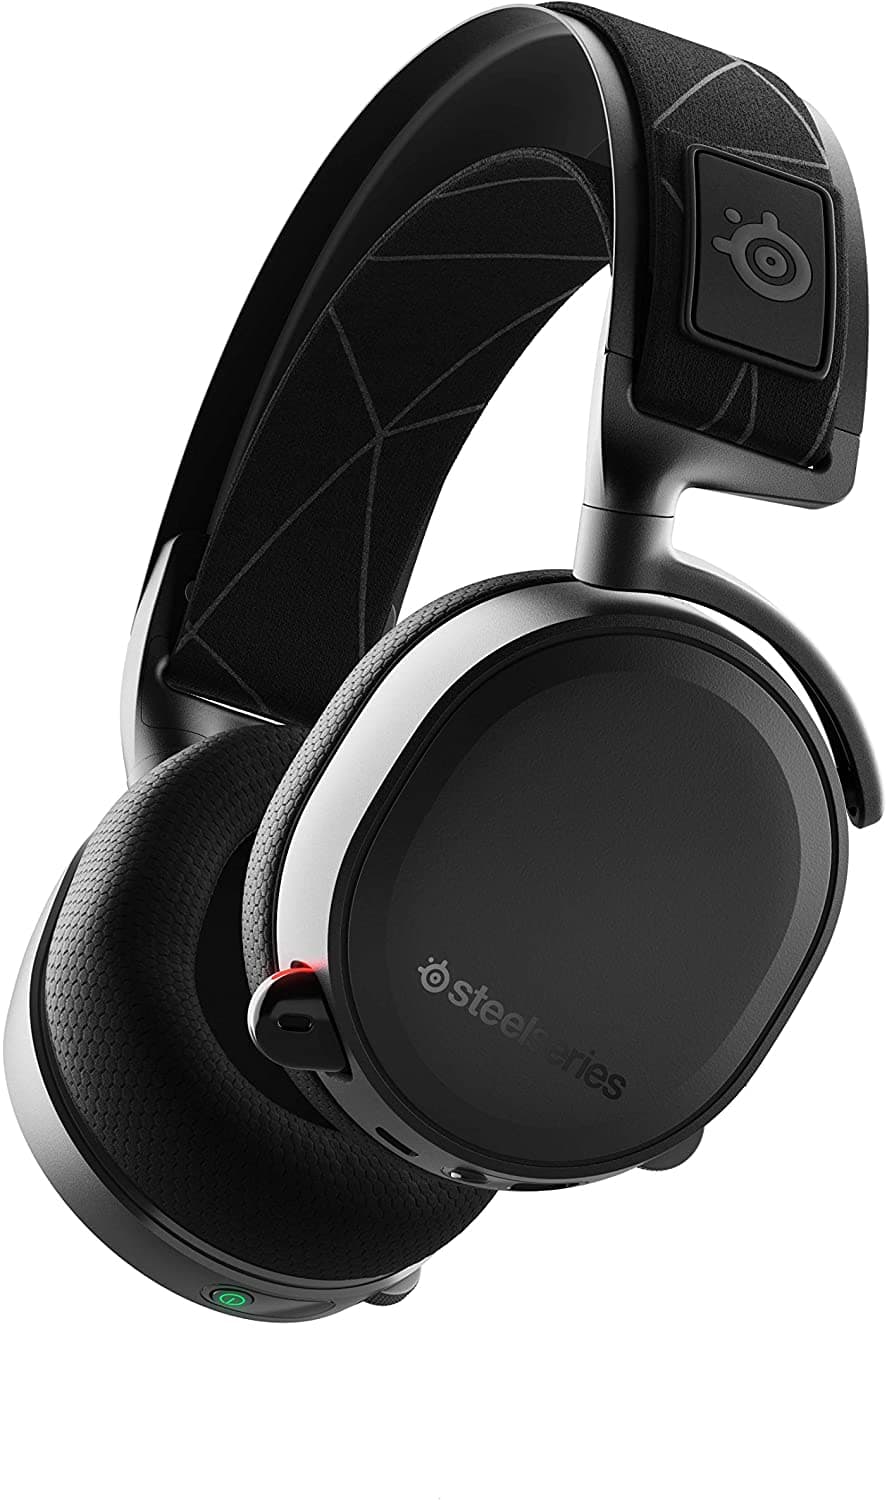
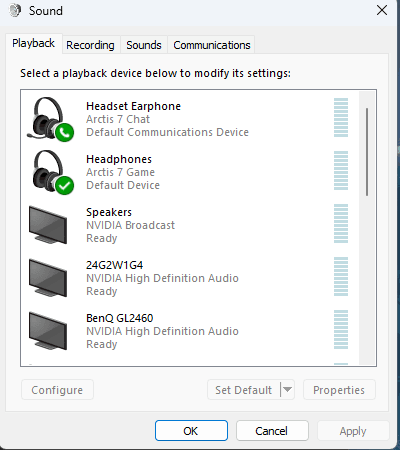
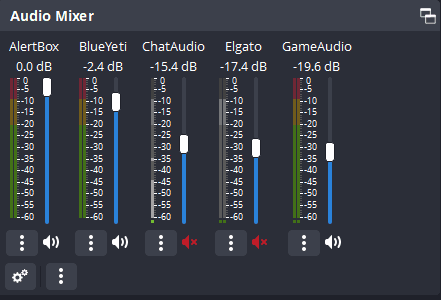
Throughout stream, the two outputs I keep a close eye on are labeled "GameAudio" and "ChatAudio", each respectively belonging to the similarly named audio channels that my headset makes use of. SteelSeries headphones like the Arctis 7 pictured below make use of two separate audio outputs that your operating system and other applications can detect as possible outputs so you can hear both the game and communications through applications like Discord at the same time.
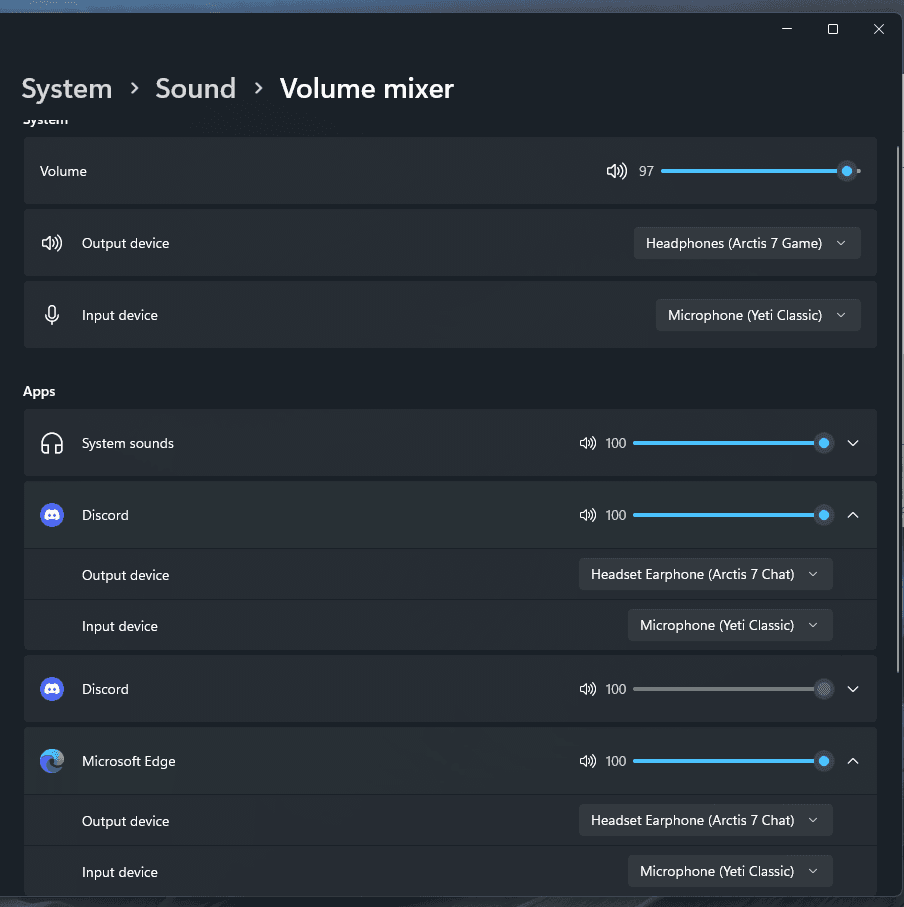
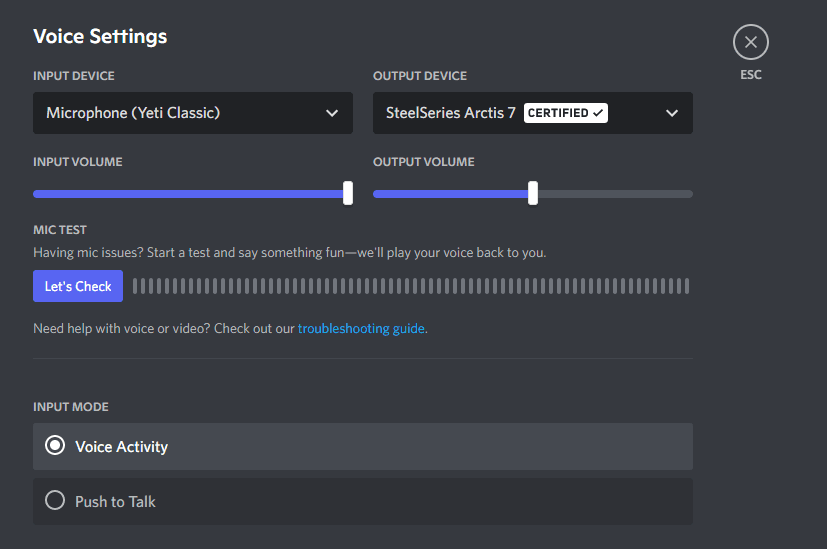
Managing synchronous playback of audio from separate applications depends on the settings of the application that you wish to control playback from and/or through your operating system's sound settings. In this case, I use the Windows Volume Mixer to select the output device of the applications I want to play audio from and/or the application settings to better manage the loudness of the audio playback from my end while also adjusting the volume of the audio sources in question using OBS.
For those without a pair of headphones with on-the-fly audio-balance adjustment features, this feature can be achieved in a similar fashion using Virtual Audio Cables. Virtual Audio Cables allow you to reroute audio from different applications and sources to add them as sources to OBS and balance them individually from OBS much like the Arctis 7's dual audio channels. Below is what the audio levels of a typical stream tends to look like in OBS Studio while playing a game and/or playing music back from the ChatAudio channel.
Inputs
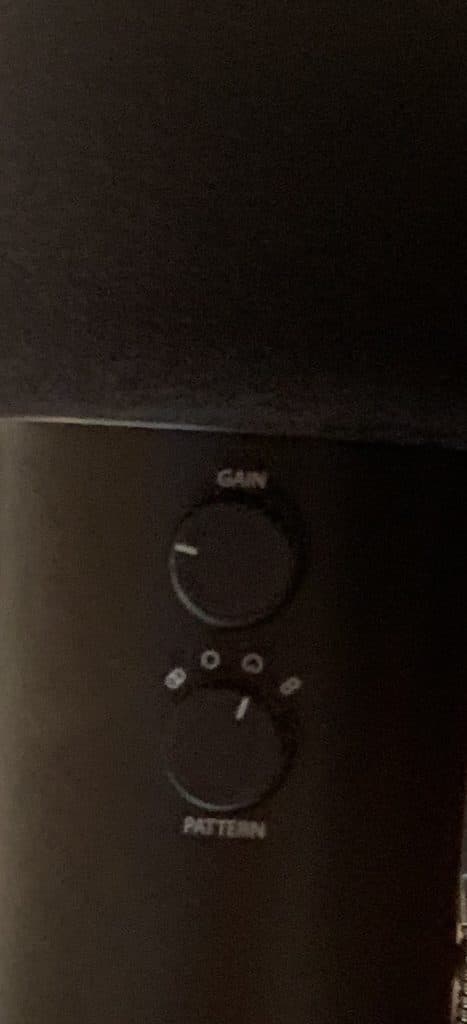
The microphone that I use to stream is a Blue Yeti microphone that's attached to the Blue Compass boom arm (pictured left). Located on the back of the Yeti are two dials: One to set the gain on the microphone and the other to set the audio pattern that the microphone uses to pick up sound. The audio pattern that's typically used is "Cardioid" as the audio source (my voice) is directly in front of the microphone at all times while the gain dial is usually set at the 9 o'clock position (pictured right).
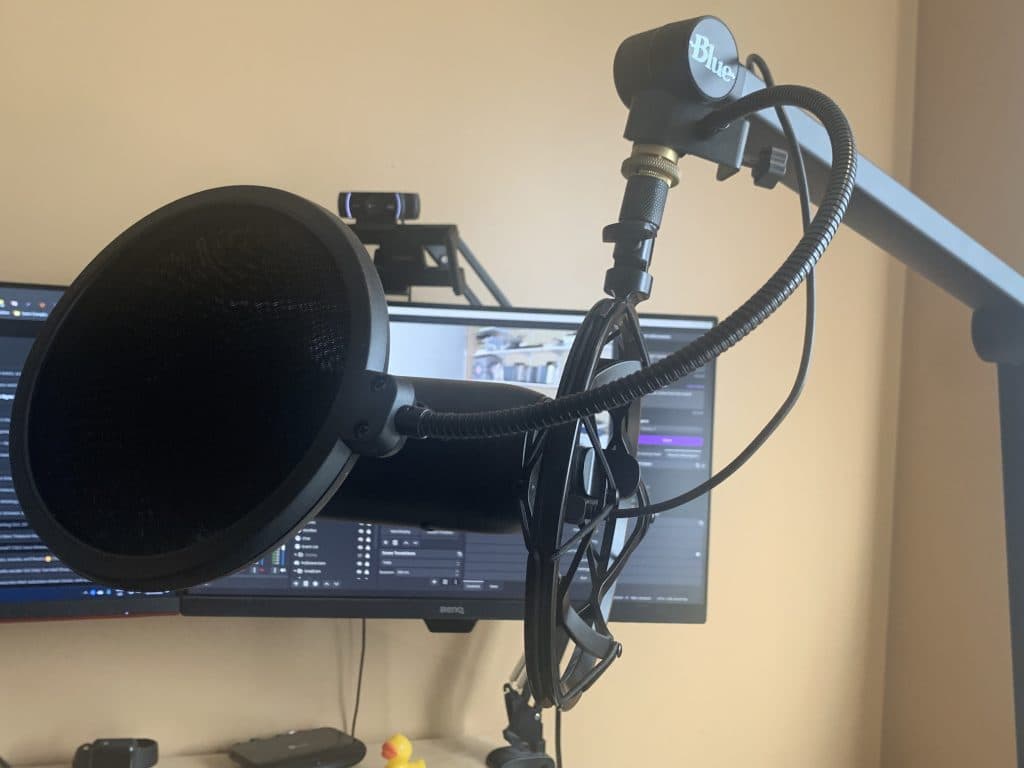
The microphone is covered by a windscreen to help block out the sound of a fan, breathing and other gust like noises from being picked up on the microphone. Placed on the arm itself is a pop filter that's approximately 3-4 inches from the microphone to aid in filtering out the harsh peaks that plosive sounds (found in words such as push, bin, coat, gold, tall, and dawn to name a few) and even laughter can induce in the microphone alongside other software filters used in OBS itself to filter out the sound of peripherals clicking and other background noise while greatly improving vocal clarity.
That being said: condenser microphones like the Blue Yeti are NOT a necessary prerequisite for streaming. A standard headset microphone will suffice just fine for most people and sound good enough on their own that they provide a great starting point should you want to hit the ground running with as minimal setup as possible until you feel comfortable with upgrading down the line. It's worth being mindful of the distance of your headset microphone relative to your face as too close will cause the microphone to peak and pop erratically, but too far and your voice will sound far away for anyone to properly hear you.
Headphones from SteelSeries, Razer, Logitech, and Turtle Beach to name a few companies also come with their own software suites to adjust the sidetone, background noise isolation, and volume of the microphone itself and can also be used in conjunction with OBS filters. Just like the Yeti and any other microphone, you need to take into account both the volume of the microphone and your voice.
Input Filters
We touched upon filters briefly in the last post and not only can they be applied to visual sources and scenes, but we can also use them for audio sources too! OBS audio filters are handy to isolate as much background noise as possible while ensuring a threshold by which audio can be picked up by your microphone and properly processed. The three I tend to rely on are the Marvel GEQ Audio plugin from Voxengo, Compressors, and Suppressors. Below are images of each of my filter settings along with a description of what each filter does and the order the filters are listed in represent the signal chain from the top down in how the filters are applied.
Bear in mind that these settings work relative to my audio equipment and setup. If you wish to use these, experiment with them as much as you can until you're satisfied with how it sounds in recordings and stream itself.
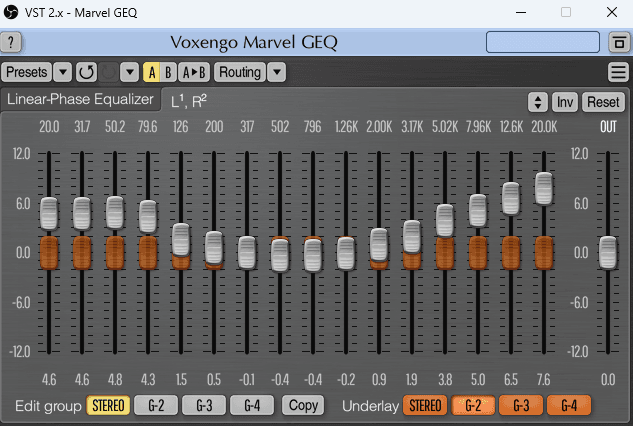
Voxengo Marvel GEQ
Marvel GEQ is a graphic equalizer plugin that allows you to apply EQ adjustments quickly and efficiently. More information about this plugin can be found on the official site and the user guide can be found here.
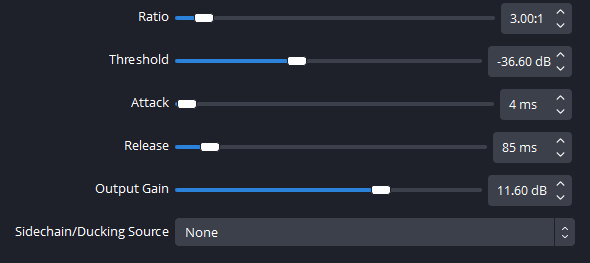
Compressor
A compressor allows you to manage the peaks in your microphone by automatically adjusting the source's volume to reduce peaking above 0db. It makes louder sounds quieter and is placed near enough at the beginning of your filter chain relative to others.
Noise Suppression
The noise suppression filter can be used to remove white noise such as the fans on a PC or the humming of an air conditioner unit. Typically, what you choose for this depends on the hardware you're using but RNNoise is typically recommended for more effective noise suppression.

Audio Mixing Guidelines
Despite the range of differences that everyone’s audio setups can have, there’s usually a few rules of thumb to look out for to make sure that everything sounds as clear as possible. Below are a few bullet points that summarize what to look out for while you’re streaming and ensuring your audio sounds as clear as possible:
Do test-recordings to make sure your voice comes out clearly.
- Refer to this post and the relevant section on recording.
Make use of subtitles and make sure they’re readable.
- Many modern PC games come with subtitle settings in the accessibility menu, so make use of them however you can so they're as readable as possible. (IE: adding a backdrop, increasing text size, boldness, etc.)
- There's also stream plugins that can capture your voice and transcribe it live but your mileage may vary as the accuracy may not be one-to-one perfect.
Make sure your mic audio never tips into the red to prevent as much peaking as possible.
- The sweet spot is usually somewhere between the green and yellow audio levels.
If you’re chatting with someone in a Discord call, ensure that their audio volume is near enough the same as yours. (IE: a difference of 0.2-0.6 decibels apart. If your decibel adjustment for your microphone is -2.4dB, choose -2.2 to -2.0db for your chat audio.)
- Practice proper conversational etiquette! Don't talk over your guest to ensure they're as clear as possible when they talk.
If the game you're playing doesn't have subtitles and a cutscene plays (example: Assassin's Creed 1), take note of the game channel's decibel reading and then boost the audio channel in OBS to make it louder before resetting it back to where it was after the cutscene ends.
- You may also want to consider summarizing what happened in the cutscene that transpired.
When in doubt, use non-copyrighted music such as Lofi playlists on YouTube so your VODs aren't muted.
- Licensed music can also be played back live on stream and silenced in the VOD itself through a new feature introduced in OBS 28.0 that allows you to select which audio track can be saved to the VOD, thus leaving out the audio track that music is playing from.
Pay close attention to chat if they mention any audio issues and do not be afraid to talk to chat to debug issues as they come up.
- Just as important: Prepare for Audio Issues to Occur Mid-Stream. The old adage of "If it can happen, it will happen" applies just as much to streaming as it does in real life so keep an eye on OBS as much as possible to ensure consistent performance of your audio outputs and inputs.
Download your VODs to analyze differences and changes to your audio so you know what to change. Be sure to take notes as to when and where things went wrong for easier scrubbing and analysis.
And most importantly:
Be less harsh to yourself when it comes to the sound of your voice!
- Almost everyone hates the sound of their own voice, myself included. But rest assured that the people who are there to watch your stream aren't there just to watch the game, they're also there for you and to listen to what you've got to say and the perspective you have to offer. However awful you think your voice sounds, there are others who will find it enjoyable to listen to.
And that's it for how I handle audio mixing! In the next chapter we'll cover how I make use of external stream control tools such as Touch Portal in conjunction with meme scenes in the next post.
Until next time, this is BallisticToaster, signing off!