- Published on
Toasty's OBS Setup: Overlays, Chatbots, Moderation, and General Guidelines
- Authors

- Name
- BallisticToaster
- @ballistictoasty
On the final part of Toasty's OBS Setup, we're going to be going through the tools you need to build a welcoming environment in your stream from overlays to chatbots and a general code of conduct to abide by when you're on the air so you can help set the tone for your stream that'll help support the community that you're helping to build every minute you're live.
Overlays
Overlays refer to the various on-screen elements that display information about your stream in real-time such as alerts, sound alert redemptions, follower goals, and messages from stream chat. Some of these overlays can also be bundled with free and premium themes that are hosted on services such as Streamlabs and StreamElements. These platforms also offer tools to help you build and customize your overlays that you can then add to your scenes in OBS Studio using Browser Sources which pull information from a user-specified URL and can be placed anywhere on your scenes like any other source. Fine-grained customization of overlays themselves requires some working knowledge of HTML, CSS, and JavaScript to make changes without breaking the overlays, though often you'll find yourself writing more CSS code than anything else.
Listed below is the source hierarchy of all four overlays that I've added as Browser Sources across all six core scenes in my OBS setup starting with their source label, where they're added from, along additional information added underneath in their respective bullet points. The bolded sources refer to Persistent browser sources that never leave the screen while the italicized sources refer to Intermittent browser sources that do leave the screen after a set period of time.
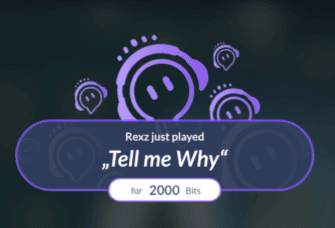
- SoundAlerts - Sound Alerts Extension
Sound Alerts notify the viewer who played what sound alert for how many bits or channel points. Proper implementation of the Sound Alerts browser source is mandatory for the extension's functionality which is added to your Twitch page and extends to your Channel Point Redeems.
The exact appearance of the Sound Alerts overlay can be customized from the website itself though I kept with the default appearance as it allowed for readable white text on a semi-transparent background. (see above)
SoundAlerts spam can be mitigated by simply setting the timer to a longer interval or adding bits to the cost of certain Sound Alerts in the settings menu of SoundAlerts, or even both.
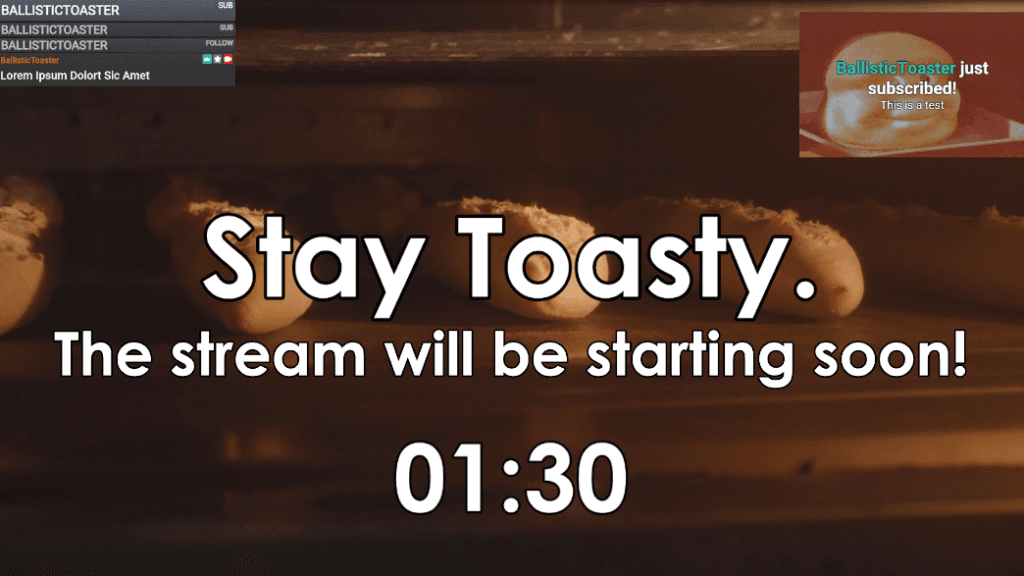
(Pictured Above) StaticScenes
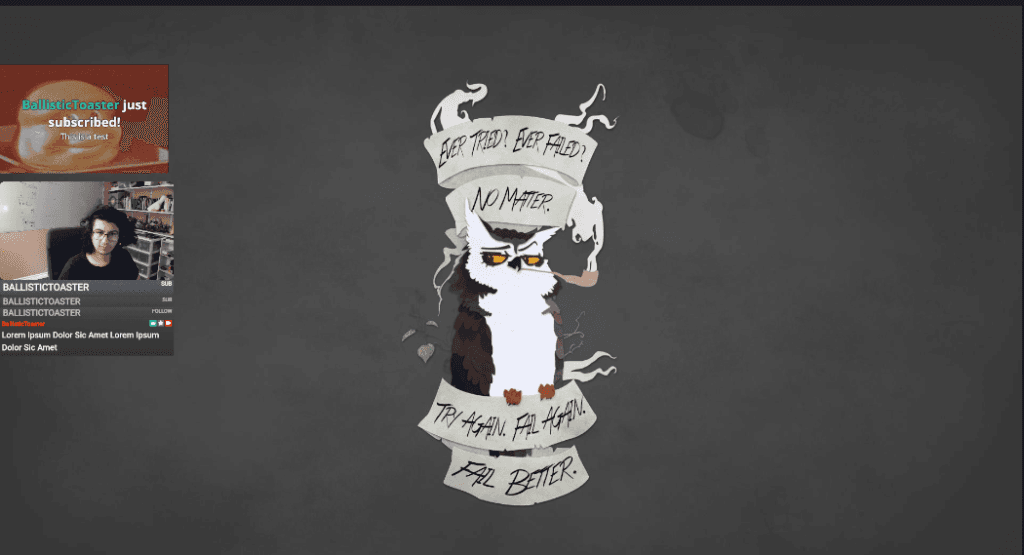
(Pictured Above) MainDisplay
AlertBox - Streamlabs Alert Box
The Alertbox displays real-time alerts of who followed, subscribed, donated, and raided. When an alert is fired, the Event List (see below) captures and displays that notification until three more events pass.
The Alert Box allows for different events to have different images/GIFs and sound effects depending on different events, including variants of each that can take place at random or at specific events. (IE: A different Gift Sub sound effect and image if more than 5 have been gifted, or a different raid sound effect that occurs at random occurrences.)
Typically, an Alert on stream lasts for seven seconds to allow for enough time for the alert to be visible and readable to viewers without overstaying its welcome.
Alerts are below the SoundAlerts source because the latter is much smaller than the former and SoundAlerts tend to not last as long as an Alert, ensuring both are visible at any given time.
- The Event List acts as a fallback to keep the most recent Alert visible at all times in the event that it doesn't properly fire.
Chat - Streamlabs Chat Box
The Streamlabs Chatbox displays any and all messages from chat. You can filter out chatters and bots, and other types of users from being visible.
Despite being an intermittent source, the chatbox can be changed to be a persistent scene by removing the fade time.
The customization theme used in the Streamlabs Chat Box is the Boxed theme with a black background and white text. Common chatbots and any commands that start with an exclamation point are ommitted from showing up in the Chat Box.
- The caveat to using pre-made themes for the Streamlabs Chat Box is that you are locked down when it comes to customization. Simply enabling custom HTML/CSS will revert you to the Clean theme. To get around this, I reverse engineered the Boxed theme and added all my customization options back through CSS and changed the flex-direction property to "column-reverse'.
- A link to my Chatbox CSS can be found here.
- The caveat to using pre-made themes for the Streamlabs Chat Box is that you are locked down when it comes to customization. Simply enabling custom HTML/CSS will revert you to the Clean theme. To get around this, I reverse engineered the Boxed theme and added all my customization options back through CSS and changed the flex-direction property to "column-reverse'.
Event List - Streamlabs Event List
The Event List tracks the most recent events that have occurred on stream, the limit of which can be changed by the broadcaster and can go up to nine events.
- How many rows you choose to go with largely depends on the positioning of your sources relative to each other. (Needs fleshing out?)
Despite being a Persistent source, the event list can be changed to be an intermittent scene by setting a fade time.
For Static Scenes (refer to Part 1) and the Facecam scene, the event list is typically located on the top-left hand corner of the screen. For the MainDisplay scene, the EventList is located directly underneath the Facecam source.
Because the Event List is a Persistent source, that means we need to ensure that the event list is as unobtrusive as possible to ensure visual consistency and cleanliness of source layouts across all scenes. If you use a facecam source,
The Event List theme used on my setup is the Crisscross theme using a grey background and the Roboto font.
When placing Browser Sources and customizing overlays, there are a few things to keep in mind while doing so:
Ensure that all text is legible and readable for ANY scene.
- This can be achieved through outlines and shadows to let text stand out more by giving them a sense of depth.
Do not let intermittent overlays overstay their welcome; usually eight-ten seconds is enough.
Keep in mind how much space overlays take up. Persistent overlays can take up a lot of space and interfere with the action on screen, which leads into the next point:
Be wary of scene cruft; the more space that browser sources and visual elements take up on screen, the more cluttered and distracting it is and the more it will take away from the viewer experience.
Experiment and find your preferences; often an alert box on its own might just be enough for you on its own. Chat boxes might not even be necessary, especially if it's not to your taste. You might even want to add follower or subscriber goals if you prefer so you always have a constant goal that you and your audience are aware of.
- It's worth noting that overlays in themselves are optional and down to personal preference, much like deciding to turn on a webcam.
Chatbots
Below is a rough summary of the Twitch bots I use help run things behind the scenes to prevent follow-botting and to enable chat commands respectively.
Sery_Bot hooks into your Twitch chat as a moderator and keeps an eye out for follow bots that enter your stream so the bot can ban them. Often these follow bots can enable hate-raids and spam messages that can disrupt streams, causing unanticipated interruptions and distress for you as a broadcaster. Commands are entered in Sery_Bot's Twitch chat to monitor and lock chat to emotes/sub mode to act as a deterrent against hate raids that might happen while you're offline and unable to moderate your chat.
StreamElements is what controls shoutouts and viewer commands. It's also where timers are added to allow for the cycling of messages that promote your social media, remind users of commands, or other messages you'd like to repeat every so often. StreamElements can also use an AutoMod feature that scans for links if they are posted, remove messages with prohibited words, and other protective measures, much like Twitch's automod.
A link to my stream commands can be found here and this list will grow as more commands are added.
Other chatbots such as the Streamlabs one and NightBot are excellent alternatives, so feel free to experiment with them and see what you like!
Moderation
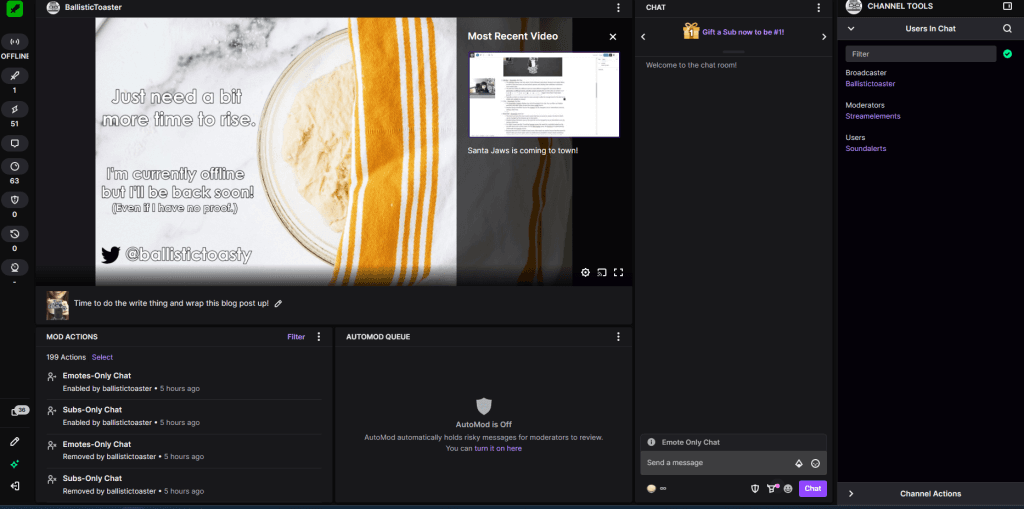
Mod View
Moderation is essential in building an inclusive community for your channel and properly doing so necessitates a deft touch from both the broadcaster and any moderators that choose to volunteer to help you out. Moderate too little and you set the expectation that people are allowed to be insensitive jerks which can lead to a toxic community but exercising too much control can risk alienating what could be an enthusiastic community unless they're enthusiastically trying to get a rise out of you. Typically, the right approach is to assume that anyone can enter your channel at any time from any age and walk of life and the onus is on you to reject those that deliberately voice caustic and inflammatory rhetoric while embracing inclusion and acceptance to those who are seeking a place in the community you are helping to build alongside your audience.
Often what viewers tend to look for isn't as much a streamer that they like more than they are searching for communities to be a part of, and that the broadcaster simply sets the tone by which the community members themselves abide by. An expectation is placed on the broadcaster to lead by example as much as possible, drawing lines in the sand to ensure that those who cross it are warned when they do and punished when repeat offenses take place, especially if their behavior can adversely affect others within your community as well. While you can add 18+ to your chat guidelines, a good rule of thumb to follow as a broadcaster is to think about what a child or teenager can pick up from how you act when you're live and to adjust your attitude, tone, humor, and choice of words accordingly.
A major part of being a broadcaster is the responsibility to be a positive influence for others both on and off-stream as much as possible and to not take yourself so seriously: Laugh at yourself, make fun of your own mistakes, and try as much as you can to not take errors and technical mishaps too harshly. After all, moderating your own attitude is one of the most effective ways you can moderate your stream and your community by extension.
Finding Moderators to Trust

Your mileage will vary on where to find moderators you can rely on but one place to start would be those in your circle of close friends and family if they're ready, willing, and able to support your streaming journey. Finding mutual friends who moderate for other channels you follow online would be helpful and often it's down to connection building on other channels you follow and communities you participate in. Being able to ask for help goes a long way and emphasizing it being a "come by when you can" type of deal is something that helps engender a lot of good will between you and prospective moderators. Moderators aren't obligated to help you out every single time you go live and if coordination of schedules is something you wish for, posting and promoting a streaming schedule on your socials may help to put your audience and moderators on the same page as you.
Handling Disruptive Users

Appropriate actions should be taken to ensure the well-being and safety of both yourself as a broadcaster and your community should you cross paths with a disruptive user on stream. Beyond abiding by the terms of service for whatever broadcast service you're using, enforcing a ban on racist, sexist, transphobic, homophobic and violent rhetoric is necessary to help build an inclusive and above all, welcoming community.
This extends to bullying, name-calling, sexually explicit comments, and inappropriate jokes, particularly in the potential presence of minors in your stream. Especially jokes that deal with sensitive topics in case they are triggering to some audience members. Often a polite but stern warning is enough to reel people back from disrupting but if additional violations are made, a ban is warranted.
Follow Bots themselves count as disruptive users and should be dealt with immediately by removing their messages (usually promotional messages) and banning them from your chat immediately as posting suspicious links can prove to be a security issue for chat members and could lead to violation of a broadcast service's Terms of Service.
These rules carry themselves to platforms such as Discord. The Golden Rule (Do unto others as you would want to have done unto you) is an excellent guiding post for how community members should act both on and off any online platform and lack of adherence to that rule should be met with consequences wherever possible, be it in the form of a warning, timeout, or outright ban.
Removing Links
Unless you're linking to clips, links on chat can be a risk as it opens the door to fraud via suspicious links. Typically, the proactive approach is a blanket ban on them entirely with clips being excepted. In place of being able to post links to chat, consider opening a Discord server with a dedicated links channel or categories for users to post them in the appropriate places. An example of this can be found on my Discord server below but other Discords you are a member of are great sources of inspiration too.

Hate Raids and Touch Portal Moderation Tools
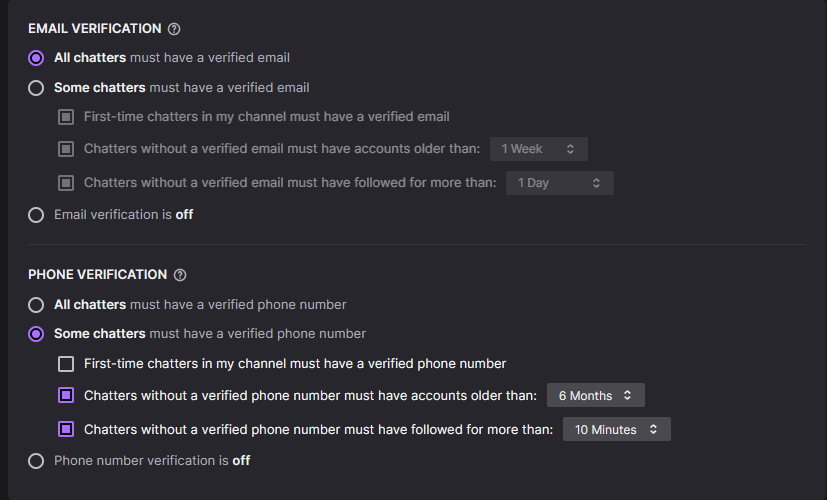
The risk of getting hate-raided or receiving abusive messages is quite low on average but never zero. While tools like Sery_Bot and Twitch's newly launched Shield Mode are effective deterrents to prevent new chatters from spamming unwanted messages on their own, there are other ways add to the security and safety of your community such as requiring email and phone verification from your chat members. This can be found in the Creator Dashboard under Settings > Moderation > Channel Privileges. The image below is an example of Chat Verification settings that should give you a good place to start from.
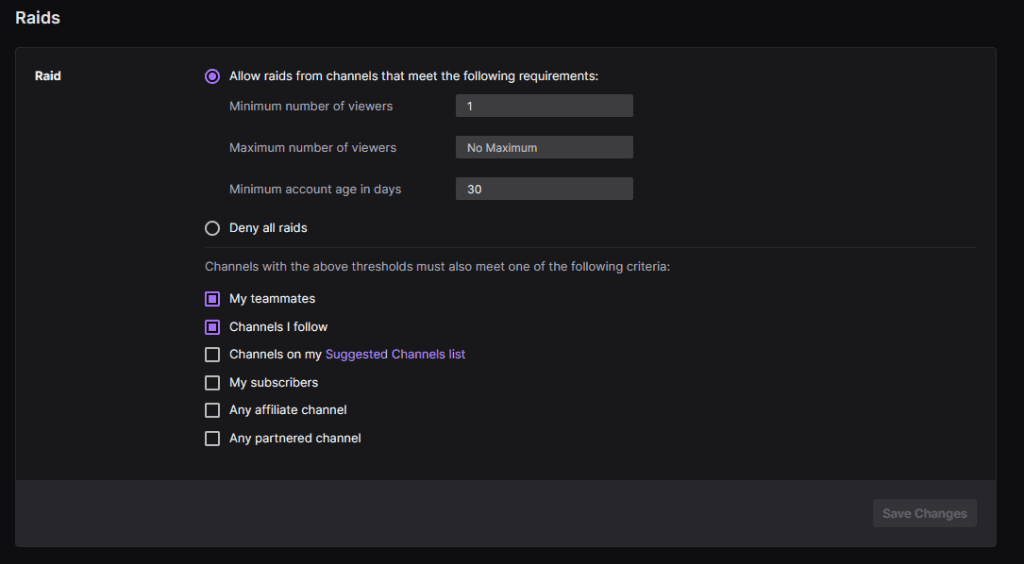
You should also be sure to make sure you change your raid settings to whatever you feel most comfortable with, even if that means denying all raids. Personally, I allow raids from people I follow and other channels that are associated with my channel (Teammates). You can find them on the Creator Dashboard under Settings > Stream > Raids.
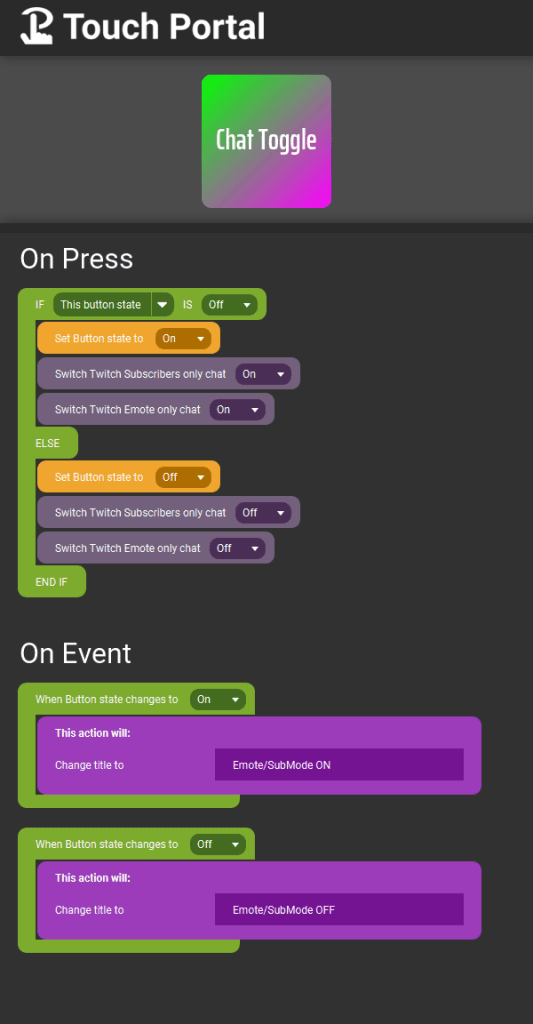
This also extends to your chat while it's offline; there's a button you can add to Touch Portal that enables Subscribers and Emote Only mode when pressed and disables both when pressed again. The idea is to lock chat when you go offline and unlock it when you go live.
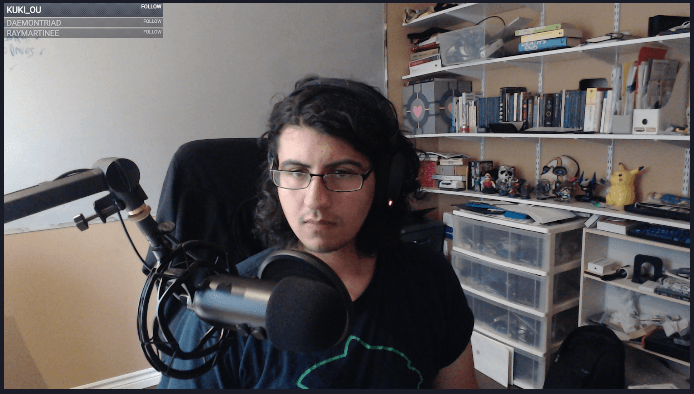
If worse comes to worse and you experience a hate-raid, one thing that can help greatly is the addition of a panic button which locks your chat to Followers and Emotes, enables slow mode, clears chat, and switches scenes while playing an ad for three minutes (available to affiliates). After both the ads and timer run down, the chat unlocks again. Below is a blueprint of what that button looks like:
General Guidelines/Broadcaster Flow
Let's bring everything full circle and outline how a typical stream goes using everything that we discussed in every OBS setup post until now. It's important to note that this will focus more on Twitch (the service I stream on) and that anything listed here is not a suggestion of what you should be doing on your own stream. Find your groove and whatever works best for you as a broadcaster but consider what you're about to read as a non-binding "script" of sorts that I tend to follow whenever I go live on my channel with a few changes here and there depending on whatever comes up.
Pre-Stream/Starting Stream
- If you have Twitter/Discord: Draft a tweet promoting your stream, what you'll be doing live, and add your channel link to it. You can also use that same tweet to promote your channel on the Self-Promotion channels on other Discord servers.
- Be sure to include the scheme (https://) so it can show up on Discord in its own box below.
- Example: "https://twitch.tv/ballistictoaster"
- Be sure to include the scheme (https://) so it can show up on Discord in its own box below.
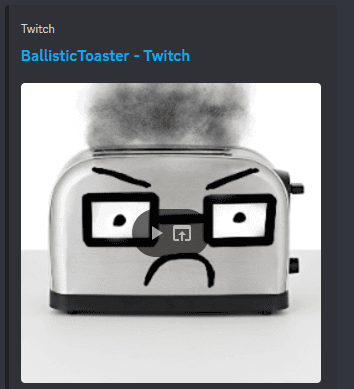
Turn OBS on, set Stream category, tags, and title to reflect what's being streamed.
Make sure the microphone is muted and the scene is set to Starting Soon.
Ensure your network is working properly using the Bandwidth Test mode of OBS and don't forget to switch it off before you go live.
Turn Touch Portal on and connect your Touch Portal device to the desktop application. Ensure your commands work and adjust your volume accordingly.
Pick music (usually Lofi Beats to Study To or something related to the game being streamed, anything so long as it doesn't trip copyright) and make sure it's playing from the right audio channels at the right volume.
- If you have a guest, make sure their audio and your mic is near enough to the same volume.
Get some water and stretch a bit.
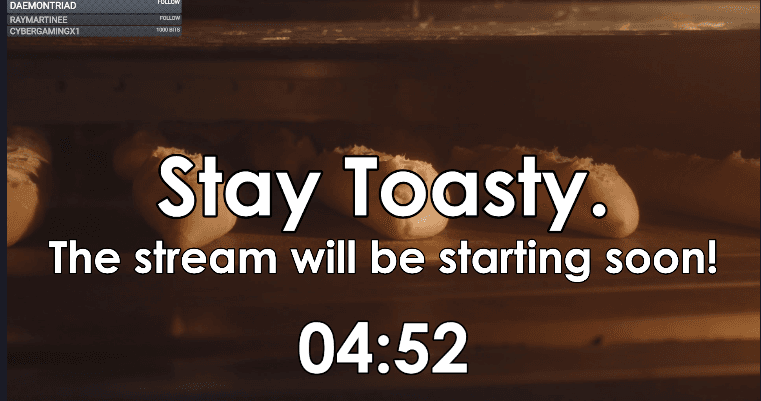
Click "Start Streaming", turn Emote/Sub Mode off, and turn the countdown timer source on. Post your tweet and message on Self-Promo channels on whichever Discord servers you wish to promote your stream on.
When the Countdown timer approaches one minute, unmute the microphone (and your guest audio if you have one) and get ready to start talking.
When the countdown timer runs down to zero and the scene changes to the Facecam scene and you start talking, you're officially in Mid-Stream.
Mid-Stream
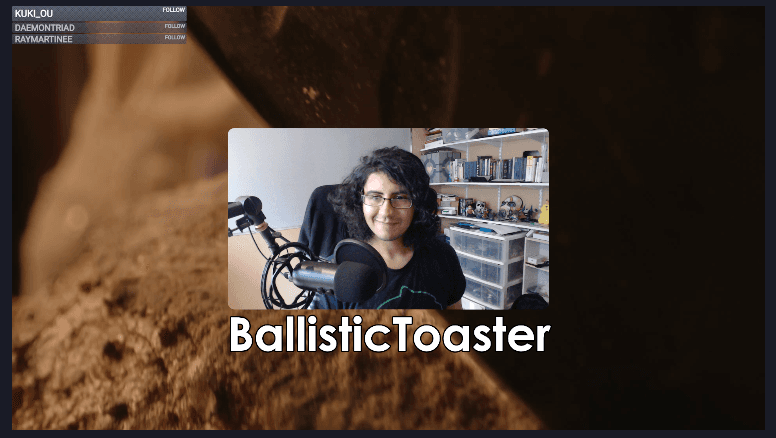
Say hello, wish everyone a good time of day wherever they are.
Provide shoutouts (use the !so command if you have it)
Thank followers and subscribers since last stream while you were offline and welcome them to the stream.
Talk a little about how your day went, what you'll be streaming, and then switch to MainDisplay.
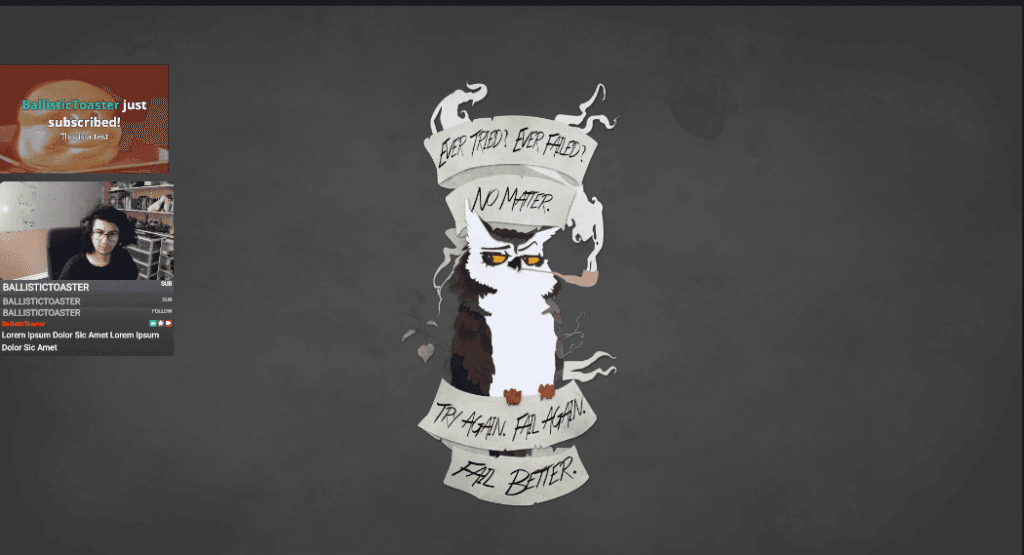
Make sure what you're streaming outputs correctly from whichever Display source you'll be using.
Keep a very close eye on audio levels to ensure auditory clarity for your viewers and enable subtitles if applicable.
Play through and commentate on the game or whatever else you're doing, use meme scenes, engage with chat, and have a good time!
If regular chatters show up, welcome them in, ask how their day went.
- If they stream, give them a shoutout and talk about what makes their content enjoyable to watch when it's easier to do so.
- Use mod comments to better assist in giving you a frame of reference to work from for who to shoutout and who not to shout out.
- If they stream, give them a shoutout and talk about what makes their content enjoyable to watch when it's easier to do so.
Say "thank you" to whoever redeems chat commands such as Hydrate, Sound Alerts, or for supporting the stream in any way. (Subscriptions, bits)
- Remind your community that subscriptions, bits, donations, etc. are never expected but always appreciated and to thank them for their support.
Thank your viewers, lurkers, chatters, etc. for hanging out with you on stream and voice appreciation that they're spending time with you.
Do not, under any circumstances call out lurkers: doing so may pressure them into talking when they don't feel comfortable doing so and they may even leave your chat, never returning to your channel ever again.
For New Followers
- Thank them for following, welcome them to your community. If applicable, plug Discord.
For New Subscribers/Resubs/Gift Subs/Bits/Donations
- Thank them for their support! If it's a resubscription, point out how many months they subbed for and thank them for their ongoing support. If they're gifted subs, thank them for however many subs they gifted or if they gifted to a specific user.
For Raids
Thank the streamer for choosing your channel to raid into.
- (Do not make light of the number of viewers in a raid.)
Shout them out using the /shoutout chat command on Twitch.
Provide a general summary of who you are, what you stream, and what you're streaming now.
Thank the raider again for trusting you with their community.
IF APPLICABLE: Plug your Discord server.
Ask how the streamer's been, how'd their stream go, and add that if they have to raid and run that it's all good and that you'll see them around later, reminding them that their health & well-being are important.
For Disruptive Users/Messages:
For first-time offenders: Inform them that their conduct does not align with that of the channel, delete the message and let them off on a warning. (Should be worth noting that most of your experiences with that kind of scenario will stop around here.)
If they repeatedly offend, time them out.
If they repeatedly offend AGAIN, ban them.
If they're being blatantly abusive/derogatory to other members in chat, your community at large, or to you, immediately ban them.
If they're bots and posting links, ban them.

- If you want to engage with chat for a bit without playing the game or show something off on camera with more clarity, change to the FullscreenFacecam scene (or source).

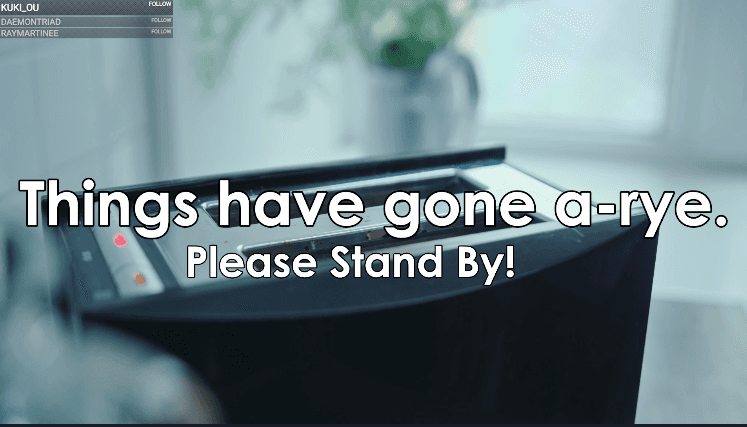
- If you have to leave for a brief moment, switch to your BeRightBack scene (or TechnicalDifficulties scene if something needs to be fixed.), mute your microphone, and have music playing in the background. (Your StartingSoon music will work for this.) Whatever the reason you have to step aside for might be, ensure that you're communicative as possible with your viewers.
Ending Stream

- Turn on music (in this case whatever you had playing for StartingSoon), switch to the Facecam scene, summarize what happened on stream, and thank viewers for tuning in along with anyone who followed, subscribed, or supported the stream.

- Choose who to raid into, provide them a shoutout, use the raid command (or from the Creator Dashboard). Say your sign-off, mute your microphone, and then switch your scene over to the StreamFinished Scene. When the raid goes through, click "Stop Streaming" and close OBS.
Post-Stream
Turn Emote/Sub Mode on again through Touch Portal or the Creator Dashboard.
Download the VOD and publish it on your channel assuming no identifying information or anything that can potentially dox you was mentioned. (If it was, DON'T publish the VOD.)
If you have Twitter: Quote tweet what you posted prior to going live, thank everyone for tuning in, summarize stream, mention who you raided, and thank whoever supported you (Raids, Subs, and Bits usually) and post it on your socials.
Final Thoughts & the Future Ahead
Before I bring this series of blog posts to a close, I just wanted to say thank you for reading and following along with them. I hope that they've helped in some way for those of you who want to dip their toes deeper into live streaming or are curious to see how I run things behind the scenes. A lot has changed since that stream with plenty of information that has since been added to their respective topics and getting to write about them has been an enlightening and educational experience for myself as both a writer and a streamer.
That said, this won't be the last time you'll see this kind of content on this site or anywhere else. New things will be added as the channel continues to grow and I intend to keep these guides coming in whatever form they may take and to detail how things change. I'm excited to see what the future has in store for the channel, for this blog, the content that's in the pipeline, and the tools I intend to experiment with down the line.
Thank you so much for your support and for sticking with me. The best is yet to crumb.
Until next time, this is BallisticToaster signing off.
Stay Toasty everyone!